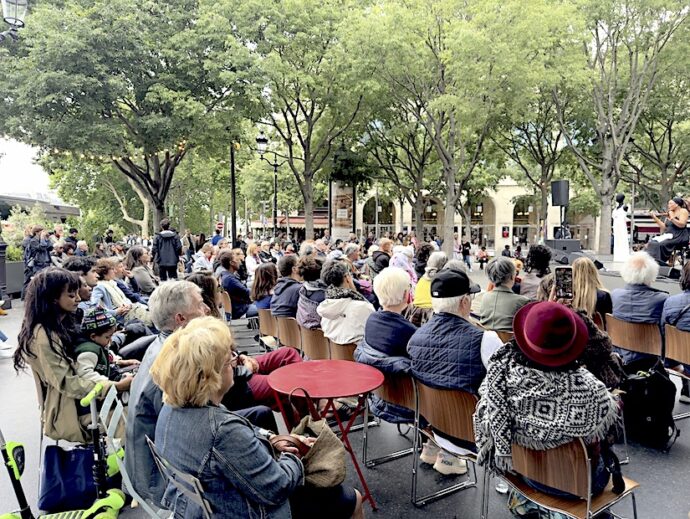
My aunt and I have been talking about making French macaroons for so long! It was one of her favorite desserts (she grew up in France), so I finally decided to just go for it.
After watching “The Great British Bake Off” and seeing them make these French macaroons, I wanted to see what all the fuss was about. So I went out and bought a cookbook by one of the judges on the show, Mary Berry. I love the fact that her name is Mary Berry and she cooks. It’s like her parents just knew she would love food. Before I go on, let me tell you the fuss is there for a reason.
Recipe: Baking with Mary Berry
Ingredients:
2 cups confectioners sugar
2 cups ground almonds (almond flour and ground almonds are the same thing. I advise using pre-ground almonds. I tried grinding my own, and it just isn’t as thin as the store-bought almond flour)
3/4 cup granulated sugar
1/4 cup cold water
4 extra large egg whites
1 tsp almond extract (I used vanilla, the almond is just so you get as much almond flavor as possible)
Red food coloring (or any coloring you want the cookie to be)
Filling:
6 tbsp soft butter
1 1/4 cups confectioners sugar
Raspberry jam (any jam will work)
Directions: I have added a few tips I figured out along the way.
- Line two baking sheets with parchment paper and set aside.
- I have one of those macaroon sets. It came with a piping bag and a silicon cookie mat. If you have a silicon mat, also know the macaroons may turn out differently. The ones I cooked on the mat were a little hollower than the ones I cooked on a sheet with parchment paper. I am not sure why this is, but my guess is it would be because the heat distribution is different.
- Combine the confectioners sugar with the almond flour in a bowl and set aside.
- Make sure you sift the sugar separately. Also sift the almond flour separately. Once both are sifted, combine them and give the mixture a quick stir. Then sift once again all together.
- I know this sounds like a lot of hassle, but sifting thins the flour and sugar, making it nice and smooth. Plus it will get rid of some of the bigger pieces of the almonds that were not ground enough. Mostly the skin, which you can toss out.
- Put the granulated sugar and water into a stainless steel pan. Heat gently over low heat, stirring, until the sugar has dissolved. Bring to a boil and boil for a few minutes without stirring until you have a shiny, clear syrup, the consistency of half-and-half. If you have a sugar thermometer, it should read 230 degrees, no more. Remove from the heat and let cool.
- I took mine off the heat right before it looked like corn syrup.
- Put two of the egg whites into a bowl and beat with a hand-held mixer on high speed until stiff but not dry. Slowly pour in the sugar syrup in a thin, steady stream, beating constantly until all the syrup is used and you have a shiny meringue.
- If you have a kitchen aid, use the whisk attachment. If you don’t have an electric mixer, you can whisk them by hand, but know you won’t need to go to the gym after because you will be sore.
- If you have never whipped egg whites, you should know a few things:
- The whites should form nice, hard peaks.
- This process takes a decent amount of time, so don’t rush the process.
- They say when you make a meringue you know when it’s ready by holding the bowl over your head. If it doesn’t fall out on top of you, then you hit the right consistency. If you try this, cross your fingers. I know when I put mine over my head I shrank away like I was going to get punched in the face.
Add the remaining two unbeaten egg whites to the sugar and almond mixture with a wooden spoon to make a very thick paste. Add the almond extract, and stir in just enough food coloring to make the mixture pink. Add a heaping tablespoonful of the meringue, beat well, then carefully fold in the remaining meringue until the mixture is an even pink color. Do not over-mix or it will be too runny.
- This recipe calls for a wooden spoon. These little macaroons are very finicky, so I would stick to the recipe as closely as possible.
- This mixture should look like lava before you add the meringue.
- When everything is mixed, it should still be very thick. I advise you to mix the meringue by making a figure eight until all is mixed together. Use the wooden spoon, not a whisk, and make sure you do it by hand. Just a couple of figure eights should do the trick.

Macaroons!
- Fill the piping bag with the mixture. Pipe 40 small rounds, each about 1 1/2 inches in diameter, onto each baking sheet. If you do not have a piping bag, use 2 teaspoons to spoon the mixture onto the pans. Set aside to dry for about an hour until a skin forms on top. Preheat the oven to 300 degrees.
- When you put the mixture into the piping bag, you will know if you over-mixed it. The macaroons should not be thin enough to just flow out of the tip. Don’t be discouraged if that is the case for you; they may still turn out okay.
- The fun part comes after you tray up all the macaroons. Take the trays and bang them on the counter a few times so all the air bubbles are released.

- Once the banging is done, just let them sit. I set a timer for an hour, and then once the hour was up I turned the oven on. Let them sit for about 25 more minutes. The timing has to do with a lot of things. If you have a lot of humidity, make sure you let them sit longer. You need these little guys to be nice and firm before you cook them.
- Bake for about 25 minutes until firm and glossy on top. Cool on the cookie sheets for about an hour. Then transfer to a wire rack.

Macaroons!
- Bake only one tray at a time. You want the heat to be evenly disbursed.
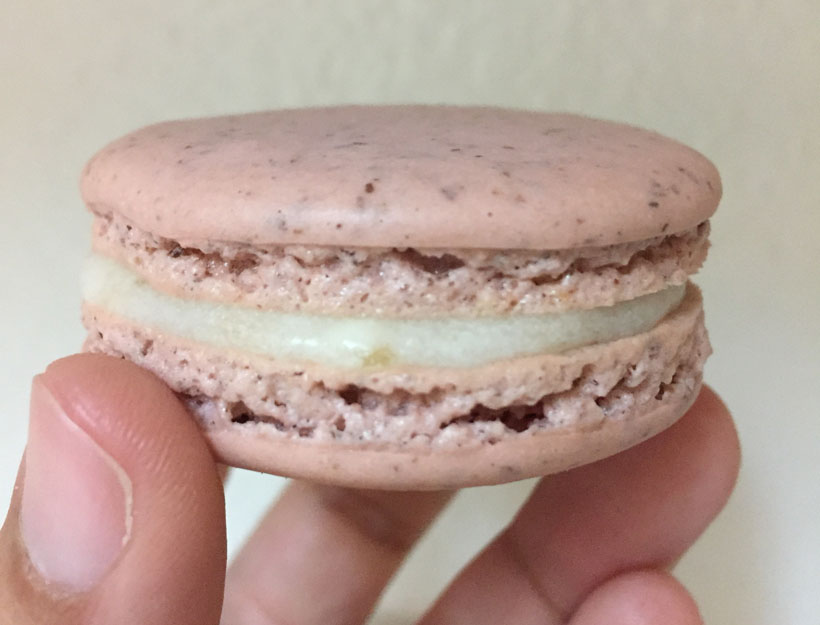
- To make the filling: Cream the butter and half the confectioners sugar in a bowl, beating until pale and fluffy. Beat in the remaining sugar a little at a time until the mixture is smooth. Spread a little jam and buttercream over the bottom of 40 macaroons, then sandwich them together with the remaining macaroons.
- I didn’t have jam, so I added a banana with the other ingredients. This may sound weird, but it tasted good. Really you can do any sort of cream or jam filling.
- If you want to make your cookie correspond with your filling, then just dye the dough whatever color your filling is (e.g. blueberry filling with blue food coloring).
In the end I was so happy I tried these little French macaroons. Even though they took forever, it was so fulfilling seeing that I did every step right and they turned out great. I tried a different recipe the day before and the macaroons looked like tiny tortillas, so I was very excited when these worked. I actually had never eaten a macaroon before these. For those of you who enjoy macaroons, this is the recipe I would recommend. I didn’t get a single bad review from friends and family who tried them out. If you decide to tackle these macaroons, just know to set aside a full day. These little things took me six hours altogether.
*